|
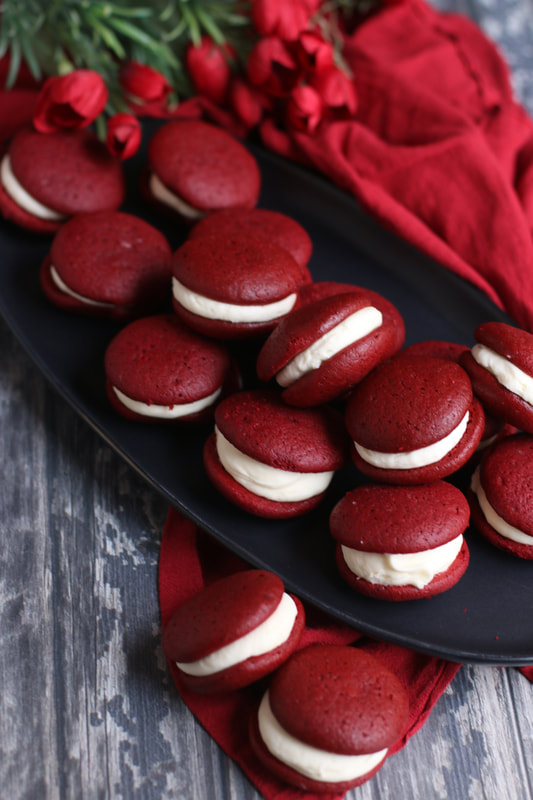
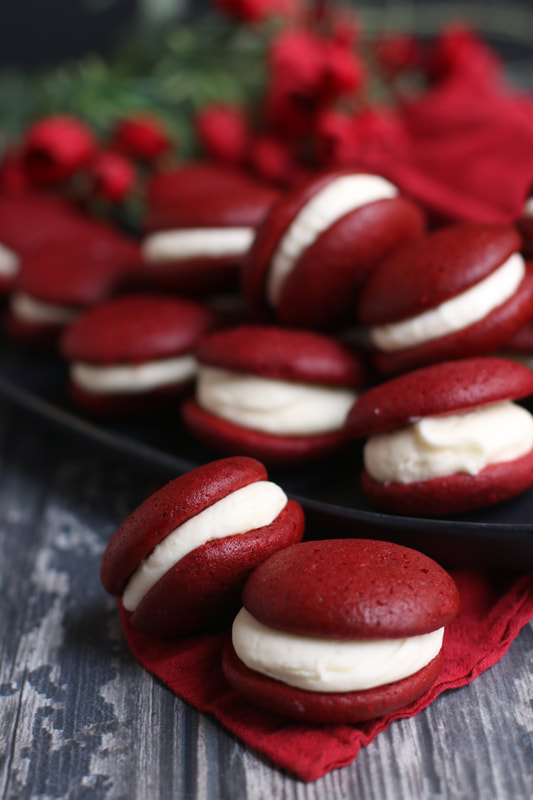
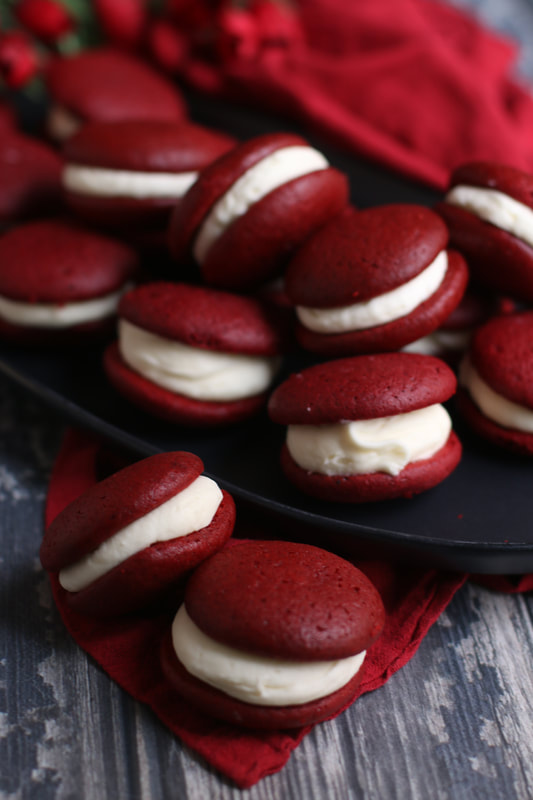
These homemade Red Velvet Whoopie Pies filled with a silky Vanilla Cream Cheese Filling are soft and fluffy perfection that melt in your mouth! Not only decadent, they taste as wonderful as they look - moist and flavorful, and oh-so-beautiful! I always forget just how easy these are to make - and just how fabulous they are to eat! Through the years I've learned a few tricks - always use quality ingredients, take your time, and ALWAYS have fun when baking! These little treats are perfect for tea parties, birthday parties, or anytime you just want to make something a little bit special. INGREDIENTS:
Red Velvet Cakes: 2 cups (250g) all-purpose flour (sifted, spooned & leveled) 3 Tablespoons (15g) unsweetened natural cocoa powder 1 teaspoon baking soda 1/2 teaspoon salt 1/2 cup unsalted butter (softened to room temperature) 1 cup (200g) packed light brown sugar 1 large egg (room temperature) 2/3 cup (160ml) buttermilk (room temperature) 2 teaspoons pure vanilla extract gel red food coloring Vanilla Cream Cheese Filling: 6 ounces block cream cheese (softened to room temperature) 1/4 cup (1/2 stick) unsalted butter (softened to room temperature) 1 and 1/2 cups (180g) powdered sugar (sifted) 1 teaspoon pure vanilla extract HOW I MAKE THESE: 1. PREPARE RED VELVET CAKES: Remove butter, egg and buttermilk from the refrigerator and allow to come to room temperature. 2. Preheat the oven to 350°F. Line two large baking sheets* with parchment paper or silicone baking mats; set aside. 3. In a medium bowl, whisk the flour, cocoa powder, baking soda, and salt until well combined. 4. In a large bowl using a hand-held or stand mixer fitted with a paddle attachment, beat the butter for 1 minute on medium-high speed until smooth and creamy. Add the brown sugar and beat on medium high speed until fluffy and well blended. Add egg and beat on medium-high speed, scraping down the sides and bottom of the bowl as needed. Slowly add vanilla, buttermilk, and 1 teaspoon of red gel food coloring and mix just until blended. Mixture may look curdled – no worries! 5. Add half of the flour mixture and beat on low speed just until combined; add remaining flour mixture and continue beating until just combined. 6. Using a small cookie scoop, scoop about 1-1/2 tablespoons of batter onto prepared baking sheets, about 3 inches apart. 7. Bake the cookies for 10-12 minutes or until centers appear set. Mine usually take 11 minutes – it will depend on your oven, but you don’t want to overbake! 8. Remove from oven and allow to cool completely. 9. PREPARE VANILLA CREAM CHEESE FILLING: Remove cream cheese and butter from refrigerator and allow to come to room temperature. 10. In a large bowl using a hand-held or stand mixer fitted with a paddle or whisk attachment, beat the cream cheese for 1 minute on high speed until completely smooth and creamy. Beat in the butter until combined. Add the sifted powdered sugar and vanilla and beat on medium-high speed until combined and creamy. 11. Pair the cookies up based on their size. 12. Pipe or spread cream cheese filling onto the flat side of one cookie and sandwich with the other. Repeat with remaining. 13. Cover whoopie pies with plastic wrap and store in an airtight container in the refrigerator for up to 3 days. YIELD: 12 whoopie pies or 24 individual cookies RECIPE NOTES*: Non-Stick Whoopie Pie Pans: If you have these pans available, you are pretty much guaranteed that all of your whoopie pies will be the same size. If you don’t have these available, scooping the batter onto parchment-paper lined baking sheets will work as well – just try to keep each of your scoops the same size so that they bake consistently and are easy to match up for filling! Basic Batter: The batter is super basic! Brown sugar provides moisture, cocoa adds flavor! Make sure you’re using natural unsweetened cocoa powder. That is KEY in this red velvet recipe. Buttermilk is essential for flavor, and red while a little gel food coloring will give you a deep red hue. You can absolutely leave the food coloring out if you prefer. A Note about Food Coloring: I’ve tested this recipe with both gel and liquid food coloring, and absolutely prefer the gel food coloring. It’s a brighter and more intense color than what you can achieve with liquid food coloring. You’d need quite a lot of liquid food coloring to obtain that signature red color in these whoopie pies– and that added liquid isn’t ideal for either taste or texture! Originally posted September 2014; revised & reposted October 2019.
© SnowflakesandCoffeecakes. All images, attachments & content are copyright protected. All rights reserved. Please do not use my images without prior permission. If you want to republish this recipe, please re-write the recipe in your own words, or link back to www.snowflakesandcoffeecakes.com for the recipe. YOU MAY ALSO LIKE...
0 Comments
Leave a Reply. |
WELCOME!HI, I’M MAMA V! I'm so happy you stopped by to visit this delicious corner of the internet! This is the place to find family favorite and kitchen-tested quality recipes, along with photographs and tips to give you the confidence to cook and bake from scratch.
You'll find a complete recipe index on the Recipe Collection page or you can use the Recipe Collection dropdown feature to see a visual recipe index by category. If you are looking for something special, the Search function will easily locate your favorite recipe or ingredients. Enjoy - and stop by often! LOOKING FOR SOMETHING SPECIAL?Type in the name of recipe, category or any ingredient to search my recipe database. This website uses marketing and tracking technologies. Opting out of this will opt you out of all cookies, except for those needed to run the website. Note that some products may not work as well without tracking cookies. Opt Out of Cookiesgoogle0c2f49157236fe49
|
- Welcome
- Blog
- About
-
Recipe Collection
- Appetizers & Charcuterie Boards
- Bakery & Sweet Shop >
- Beverages
- Breakfast & Brunch >
- Fruits >
- The Main Event >
- Salads
- Sauces, Spices & Glazes
- Side Dishes
- Vegetables
-
Holidays & Special Celebrations
>
- Sleighrides & Cocoa Parties
- Valentines
- Mardi Gras
- St. Patrick's Day
- Easter
- Cinco de Mayo
- Kentucky Derby
- Garden Teas
- Patriotic
- Fathers' Day
- Halloween
- Football & SuperBowl
- Thanksgiving
- Christmas Traditions >
- New Year Celebration
- Baby Showers
- Bridal Showers & Weddings
- Birthday Parties
- Rehearsal Dinners & Day-After-Brunches
- Seasonal Favorites >
- Cooking School
- GARDENING
- Contact
Copyright Statement© Snowflakes & Coffeecakes 2024. All rights reserved.
All images & content are copyright protected. Please do not use any of my images without prior permission. Unauthorized use and/or duplication of this material without express and written permission from this site’s owner is strictly prohibited. Thank you for visiting! I hope that you enjoyed your stay, and have found some recipes that your family will enjoy! Have any questions or comments? Feel free to contact me! Bon Appétit, Mama V |





 RSS Feed

