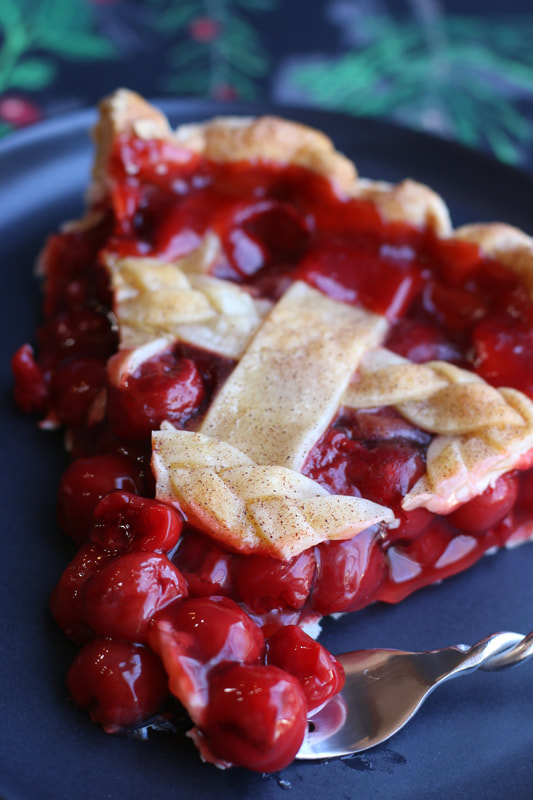
 Classic Pumpkin Pie with Sugared Cranberries Libby’s recently changed their famous pie recipe on the pumpkin puree can label, and it was the first change to America’s favorite pie in 75 years! I’ve tweaked this for our new favorite pumpkin pie – the best Classic Pumpkin Pie you’ll ever have! The custard-like filling is silky and velvety smooth - bursting with fragrant spices and flavor, and is so pretty when decorated with pie crust leaves and fresh Sugared Cranberries. Luckily this traditional, made-from-scratch pie is still as easy as ever – and the recipe that my family LOVES! 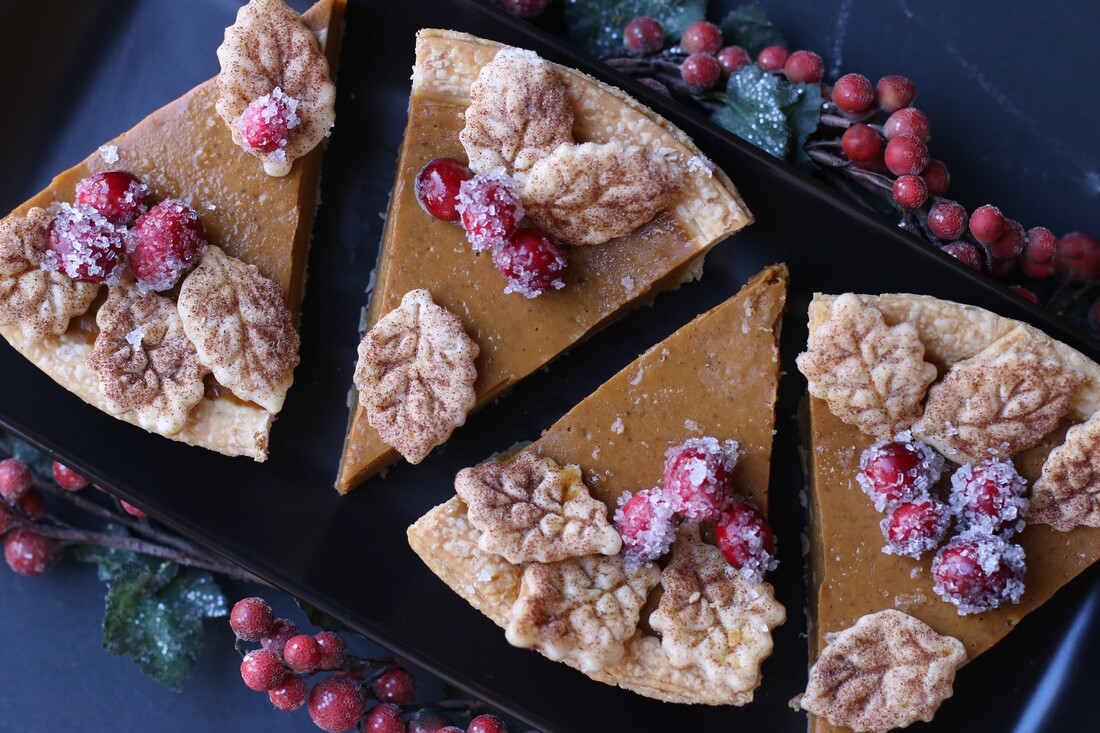 Classic Pumpkin Pie with Sugared Cranberries & Sweetened Whipped Cream WHAT IS THE DIFFERENCE BETWEEN THE ORIGINAL LIBBY'S PUMPKIN PIE RECIPE AND THE NEW RECIPE?Libby’s recently released a new pumpkin pie recipe on their pumpkin cans, with the first changes to the beloved recipe in generations. The ORIGINAL recipe called for:
The NEW recipe calls for:
For my version, I've tweaked the new recipe to add dark brown sugar for a touch of caramel color and hint of sweetness, and ramped up the spices. I also par-bake the pie crust, so that it stays perfectly golden and flaky. There's nothing worse than a soggy pie crust! A sprinkle of cinnamon sugar around the edge makes for the most wonderful crust ever! 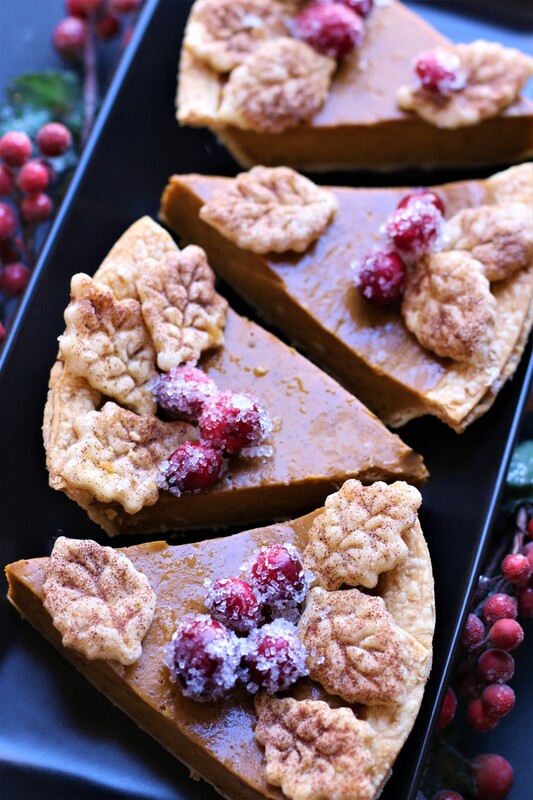 Classic Pumpkin Pie with Sugared Cranberries & Sweetened Whipped Cream RECIPE TIPS & TRICKS FOR THE BEST PUMPKIN PIE:
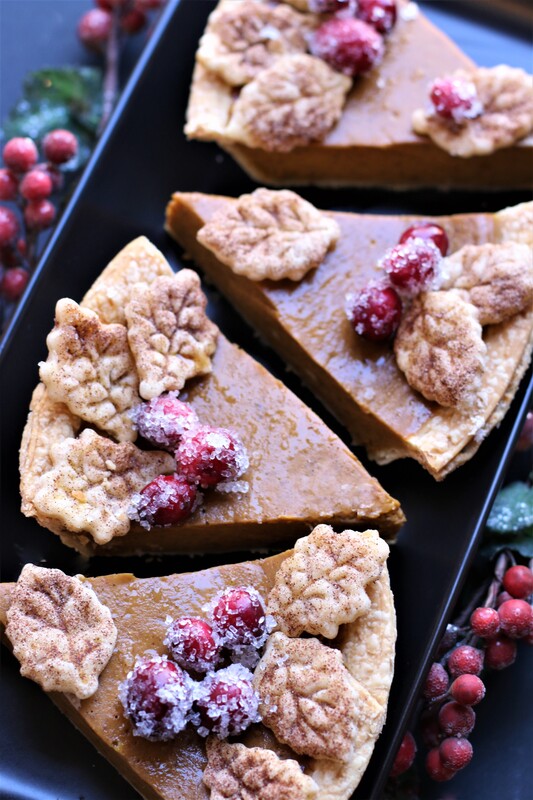 Classic Pumpkin Pie with Sugared Cranberries & Sweetened Whipped Cream
INGREDIENTS:
1 (9-inch) pastry for a 9-inch pie crust (homemade, frozen or refrigerated) Egg wash: 1 regular egg + 1 tablespoon milk Cinnamon Sugar for sprinkling 2 large eggs (room temperature) 1 can (15 oz.) Libby’s Canned Pumpkin Puree 1 can (14 oz.) sweetened condensed milk 1 cup (8 oz.) evaporated milk 1 teaspoon pure vanilla extract ¼ cup(57g) dark brown sugar 2 teaspoons cinnamon 1 teaspoon ginger ½ teaspoon cloves ½ teaspoon nutmeg 1 teaspoon salt SUGARED CRANBERRIES: 1 cup fresh cranberries (not frozen) 2 cups (400g) granulated sugar (divided) 1 cup water HOW I MAKE THIS:
YIELD: 8 servings RECIPE NOTES:
Original recipe created by Snowflakes & Coffeecakes; published November 2022; revised April 2024.
© SnowflakesandCoffeecakes. All images, attachments & content are copyright protected. All rights reserved. Please do not use my images without prior permission. If you want to republish this recipe, please re-write the recipe in your own words, or link back to www.snowflakesandcoffeecakes.com for the recipe. Tried it and loved it? Snap a picture and share it with me on Instagram @SnowflakesandCoffeecakes and by using the hashtag #SnowflakesandCoffeecakes. NEVER MISS A NEW RECIPE! FOLLOW SNOWFLAKES & COFFEECAKES ON FACEBOOK, INSTAGRAM & PINTEREST!YOU MAY ALSO LIKE...
0 Comments
Leave a Reply. |

WELCOME!HI, I’M MAMA V! I'm so happy you stopped by to visit this delicious corner of the internet! This is the place to find family favorite and kitchen-tested quality recipes, along with photographs and tips to give you the confidence to cook and bake from scratch.
You'll find a complete recipe index on the Recipe Collection page or you can use the Recipe Collection dropdown feature to see a visual recipe index by category. If you are looking for something special, the Search function will easily locate your favorite recipe or ingredients. Enjoy - and stop by often! LOOKING FOR SOMETHING SPECIAL?Type in the name of recipe, category or any ingredient to search my recipe database. LET'S CONNECT!Never miss a recipe! Please click to follow me on:
google0c2f49157236fe49
|

 RSS Feed
Copyright Statement© Snowflakes & Coffeecakes 2024. All rights reserved.
All images & content are copyright protected. Please do not use any of my images without prior permission. Unauthorized use and/or duplication of this material without express and written permission from this site’s owner is strictly prohibited. Thank you for visiting! I hope that you enjoyed your stay, and have found some recipes that your family will enjoy! Have any questions or comments? Feel free to contact me! Bon Appétit, Mama V |

|